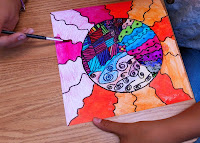
The students created one design that they could use to create two different projects. The first was a watercolor and the second was embossed foil. The pattern could be adapted to fit the medium. The first step was to sketch a design. The starting format was a circle with a square background. After creating a design they were happy with they transferred the design to watercolor paper and used black sharpies to outline everything. Watercolor pencils were used to add color and then water was used to activate the pencils if they wanted a watercolor effect.
 |
| Creating the design |
 |
| Outlining with sharpie |
 |
| Activating the watercolor pencils |
 |
| Coloring with watercolor pencils |
 |
| Final Watercolor |
Students working on their watercolors


Examples of the finished watercolor designs
After finishing their watercolors the students transferred their original design to a piece of cardboard wrapped with several layers of heavy duty aluminum foil. At this point they could make adjustments to the design by adding or subtracting details. They used a wood stylus to deepen the pattern they traced.
The final step was to sponge the entire surface with thinned down tempera paint. The paint was then wiped from the surface leaving paint in the recessed lines.
Examples of the final aluminum foil designs
Examples of same pattern in both mediums


No comments:
Post a Comment