Pages

Friday, November 15, 2013

Sixth Grade: Faux Metal Masks


After the sixth graders finished their symmetrical paper masks we started their second mask project.  We had already looked at a variety of masks from different cultures and discussed the similarities and differences.  The first step of this project was to design a mask.  The students were encouraged to keep their original design fairly simple.  More intricate details could be added later.


The drawings were used as a pattern to transfer the designs onto cardboard.  The cardboard shapes were cut out and layered on a background sheet of cardboard to make a mask with a low relief design.  After all the pieces were cut out and in place they were glued to the background.


When all the pieces were glued down the students had the option of adding more details, outlines and patterning using lines or dots of glue.  The glue needed to be fairly thick.  If the glue was too thin and didn't show up well after drying, an additional layer of glue might be needed. The masks were put aside to allow the glue to dry completely.


The following week we were ready for the faux metal painting.  The first step was to paint the entire surface with black tempera paint.  When it was dry to the touch the students lightly sponged on a layer of gold, bronze or silver tempera paint being careful to leave the recessed areas black.


Final Faux Masks


Sunday, November 3, 2013

Sixth Grade: Symmetrical Paper Masks

The sixth graders made two masks using different techniques.  Before starting our projects we looked at masks from different cultures and talked about reasons for mask making, materials used to create masks and abstract/realistic design.  For this project we also focused on symmetry and negative/positive shapes.

The students started the project by making a simple symmetrical pencil sketch.  The instructions were to fill the page and use large simplified shapes for the features.  The design was cut in half and transferred to a half sheet of construction paper.  The shapes were cut out and placed onto a full sheet of contrasting paper.  Alternating shapes were flipped and glued down to the opposite sides of the center line which created negative and positive shapes.


Friday, October 11, 2013

5/6 Grade: Cultural Symbolism

This class was a combination of 5th and 6th graders.  Since they had been studying ancient civilizations I thought it would be a good time to look at symbolism and stylization in the art of  different cultures around the world.  After a discussion about symbolism we talked about how they could blend modern symbols/stylization with what they saw in traditional art from other cultures to create their own artwork.  They had the choice of focusing on the stylization and pattern or personal symbolism.

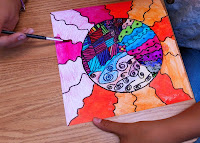
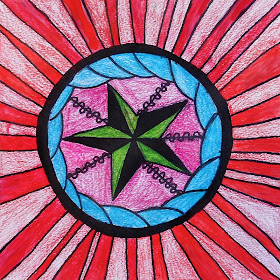
The students created one design that they could use to create two different projects.  The first was a watercolor and the second was embossed foil.  The pattern could be adapted to fit the medium.  The first step was to sketch a design.  The starting format was a circle with a square background.  After creating a design they were happy with they transferred the design to watercolor paper and used black sharpies to outline everything. Watercolor pencils were used to add color and then water was used to activate the pencils if they wanted a watercolor effect.

Creating the design
Outlining with sharpie

Activating the watercolor pencils
Coloring with watercolor pencils


Final Watercolor

Students working on their watercolors


Examples of the finished watercolor designs


After finishing their watercolors the students transferred their original design to a piece of cardboard wrapped with several layers of heavy duty aluminum foil.  At this point they could make adjustments to the design by adding or subtracting details. They used a wood stylus to deepen the pattern they traced.


The final step was to sponge the entire surface with thinned down tempera paint.   The paint was then wiped from the surface leaving paint in the recessed lines.


Examples of the final aluminum foil designs


Examples of same pattern in both mediums